In the vast world of online platforms and social media, a term often pops up in conversations among marketers, entrepreneurs, and avid users alike – PVA account. But what exactly is a PVA account? If you’ve been wondering about this elusive term and are curious to dive into its meaning and significance, you’re in the right place. This blog post will unravel the mysteries surrounding PVA accounts, exploring their definition, purpose, and why they have become an essential tool in the digital realm.
Picture this: you’ve just created your new social media account, ready to connect with friends and family and grow your business. But as you embark on this journey, you stumble upon the acronym PVA, leaving you scratching your head in confusion. Fear not, for we are here to guide you through the intricacies of PVA accounts. So, please grab a cup of coffee and get ready to venture into the fascinating world of online accounts as we uncover the secrets behind this cryptic term.
What makes a PVA account so unique? Why go through the trouble of verifying your online presence? And what benefits do these accounts bring to the table? These are just some of the questions we will address in this blog post as we dive deep into the nuances of PVA accounts and explore their ever-growing importance in the digital landscape.
Here are some key takeaways from PVA accounts:
- A PVA account is a type of account that has undergone a verification process using a unique phone number.
- The verification process adds an extra layer of authenticity and credibility to the account.
- PVA accounts are used in digital marketing strategies and social media management to enhance engagement and security.
- Creating a PVA account typically involves registering with an online platform and providing a unique phone number for verification.
- PVA accounts offer advantages such as increased credibility, bypassing limitations, and better profile management.
Understanding PVA Account
PVA stands for “Phone Verified Account,” sometimes referred to as “Virtual Phone Account”, and it relates to verifying an online account using a valid phone number. This process adds an extra layer of authenticity and credibility to the account, making it more trustworthy in the eyes of online platforms and users.
PVA accounts are significant for individuals and businesses because they offer several advantages. Firstly, platforms’ algorithms often consider these accounts more trustworthy, which can result in higher engagement and reach. When an account is verified, it signals to the platform that the user is genuine, not a bot or fake profile.
Furthermore, PVA accounts allow users to bypass certain limitations set by online platforms. For example, PVA accounts can like posts, follow other users, and comment without triggering suspicion. This flexibility benefits businesses or individuals who manage different profiles or brands within one login interface. Instead of juggling multiple accounts, they can conveniently access and control all their profiles through PVA accounts.
The Significance of Phone Verification
The primary purpose of phone verification in PVA accounts is to reduce the risk of fraudulent activities, such as spam account creation and unauthorized access. By confirming the user’s identity through their phone number, online platforms can enhance security measures and build trust among their user base.
Use Cases and Examples
PVA accounts find widespread applications in various scenarios. Businesses often use them for marketing purposes, ensuring each account represents a genuine and engaged user. Individuals may opt for PVA accounts to establish a credible online presence, especially in professional and networking platforms.
What Makes a PVA Account Valuable?
The value of a PVA account lies in its ability to establish trust and authenticity. Platforms often prioritize PVA accounts, granting them additional benefits such as increased visibility or enhanced features. PVA accounts are a vital tool for marketing and customer engagement for businesses. They allow companies to engage with their audience and build a reputable online presence. Moreover, PVA accounts are essential for maintaining privacy and security.
With the prevalence of online scams and hacking attempts, having a PVA account ensures that your personal data and online activities remain protected. It adds an extra layer of verification, mitigating the risk of unauthorized access.
The value of a PVA account stems from its ability to establish trust, enhance security, and unlock various benefits on digital platforms. Whether you’re an individual or a business, having a PVA account is crucial for navigating the online world effectively.
When considering the value of PVA accounts, it’s essential to consider vital factors before purchasing them. You can find detailed insights into this aspect in our article, “12 key factors to consider before purchasing PVA accounts“
How PVA Accounts are Created?
The process of creating a PVA account involves verifying your phone number during the registration process. When signing up for an online platform or social media network, you will be prompted to enter your phone number. Once entered, you will receive a verification code via SMS or call, which you must enter on the platform to complete the verification process.
Different platforms may have slightly different procedures for creating PVA accounts. Some may require additional information or steps to verify your identity. However, the underlying principle remains the same – verifying your phone number to establish authenticity.
PVA accounts have become increasingly important in today’s digital landscape. With the rise of social media platforms and online marketplaces, having a verified account has become crucial for individuals and businesses. It helps establish trust with other users and opens up opportunities for enhanced features and functionalities.
What is the Verification Process for PVA Accounts?
The verification process of PVA accounts usually involves receiving a unique code on your registered phone number. This code can be sent via SMS or through an automated phone call. Once you receive the code, you must enter it on the platform to confirm that you can access the provided phone number. This verification step is crucial as it ensures that the account is created by a natural person, not a bot or fake profile. It adds an extra layer of security and helps maintain the platform’s integrity.
What is the Difference Between PVA and Non-PVA Accounts?
The main difference between PVA and non-PVA accounts lies in the verification process. PVA accounts require users to verify their phone numbers, while non-PVA accounts do not have this requirement. Non-PVA accounts are relatively more straightforward to create as they do not involve any additional steps for verification. However, they may need specific features and functionalities that are available only to PVA account holders. Additionally, non-PVA accounts may be more susceptible to spam, fake profiles, and other fraudulent activities.
Why Do PVA Accounts Matter?
PVA accounts matter because they offer several advantages over non-PVA accounts. Firstly, they provide an added layer of security by verifying users’ phone numbers, making it harder for bots or fake profiles to infiltrate online platforms.
Secondly, having a verified account helps in establishing trust with other users. When people see that your account has been confirmed, they are more likely to engage with you or your business. This can be particularly beneficial for individuals looking to build their personal brand or businesses aiming to attract potential customers.
Furthermore, PVA accounts often have additional features and functionalities unavailable to non-PVA account holders. These features can enhance your online presence and improve your overall user experience on various platforms.
What are the Different Types of PVA Accounts?
When it comes to PVA accounts, there are several different types that you should be aware of. One common type is a Phone Verified Account, which requires a valid phone number for verification. Another type is Social Media PVA accounts, often used for marketing on platforms like Instagram and Twitter. There are also email-verified accounts, which require verification through a valid email address. Each type of PVA account serves a specific purpose and has advantages and limitations. You can choose the right account for your needs by understanding the different types of PVA accounts.
How Do PVA Accounts Work?
PVA accounts work by linking your online presence to a verified phone number. When you create a PVA account, the platform records your phone number and associates it with your account. This linkage allows the platform to verify your identity and ensure that you are a real person.
Once your account is verified, you can enjoy the benefits of being a PVA account holder. These benefits may include access to exclusive features, increased credibility, and enhanced security.
What is the Role of PVA Accounts in Social Media Marketing?
In the realm of digital marketing and online platforms, PVA accounts play a crucial role. They provide marketers with a reliable way to establish their brand’s presence on various platforms while ensuring authenticity.
By using PVA accounts, marketers can engage with their target audience more effectively and build trust among potential customers. Additionally, having a verified account can help gain access to advanced marketing tools and features only available to PVA account holders.
What is the Role of PVA Accounts in Social Media Marketing?
Social media marketing heavily relies on building connections and engaging with users. In this context, PVA accounts are valuable assets for social media marketers.
A verified social media account gives marketers an edge by establishing credibility and trust among their target audience. It helps build an authentic online presence that resonates with users and encourages them to interact with the brand or business.
How Do PVA Accounts Help in Social Media Management?
PVA accounts are instrumental in social media management as they offer several advantages for individuals or businesses managing multiple accounts.
Firstly, having verified accounts allows for better control over online profiles. It reduces the risk of suspending or banning accounts due to suspicious activities. This is particularly important for businesses that rely on social media platforms for their marketing and customer engagement strategies.
Secondly, PVA accounts enable efficient management of multiple profiles. With verified accounts, users can easily switch between different profiles without the hassle of re-verification or account restrictions.
How Do You Create and Set Up a PVA Account?
Creating and setting up a PVA account may vary depending on your platform. However, here are six general steps to guide you through the process:
Step 1: Choose the platform where you want to create a PVA account.
Step 2: Click on the “Sign Up” or “Create Account” button.
Step 3: Enter your personal information, including your name, email address, and phone number.
Step 4: Follow the verification process by entering the code sent to your phone number via SMS or call.
Step 5: Create a strong password for your account.
Step 6: Complete any additional steps the platform requires, such as setting up a profile picture or adding personal details.
Once these steps are completed, you will successfully create and set up your PVA account. You can now enjoy the benefits of having a verified online presence!
Tips and best practices to consider when creating and setting up a PVA account:
- Choose a solid and unique password to ensure the security of your account.
- Enable two-factor authentication if the platform offers this feature.
- Regularly update and review your account settings to keep your information up-to-date and secure.
You can create and set up a PVA account by implementing these best practices.
What are the Advantages of Using PVA Accounts for Individuals and Businesses?
PVA accounts offer numerous advantages for both individuals and businesses. Here is table showing some key benefits of phone-verified accounts:
| For individuals: | For businesses: |
| Better security: A verified account adds extra protection to protect personal information from unauthorized access. | Build trust: A verified business account inspires confidence among potential customers, increasing brand loyalty and sales. |
| Increase credibility: A verified account helps establish trust with other users, making connecting and engaging with people easier. | Enhanced marketing opportunities: PVA accounts provide access to advanced marketing tools and features that can help businesses reach their target audience more effectively. |
| Access to exclusive features: PVA account holders often enjoy additional features and functionalities unavailable to non-PVA account holders. | Better customer support: A verified account allows businesses to provide better customer support by ensuring they interact with genuine customers. |
How Do You Optimize PVA Accounts for Maximum Efficiency?
To optimize your PVA accounts for maximum efficiency, consider the following four tips:
- Regularly update your profile information and keep it relevant.
- Engage with your audience by promptly responding to comments, messages, and feedback.
- Create high-quality content that resonates with your target audience.
- Utilize the platform’s analytics tools to track the performance of your posts and campaigns.
By implementing these strategies, you can make the most out of your PVA accounts and achieve optimal results in engagement, reach, and conversions.
What are the Best Practices for PVA Account Management?
To effectively manage your PVA accounts, consider the following best practices:
- Regularly update your account information, including profile and contact information, to ensure accuracy and relevance.
- Use unique and strong passwords for each PVA account, and consider enabling two-factor authentication for an extra layer of security.
- Maintain a consistent posting schedule to keep your audience engaged, responding to comments, messages, and inquiries promptly and professionally.
- Create a content strategy that aligns with your brand’s goals and values.
- Regularly monitor your accounts for any suspicious activities or unauthorized access.
- Keep track of the latest platform updates and algorithm changes to stay ahead of the competition.
By following these best practices, you can ensure that your PVA accounts are well-managed and contribute to the growth and success of your online presence.
How Do You Maintain PVA Account Security and Authenticity?
Maintaining the security and authenticity of your PVA accounts is crucial in today’s digital landscape. Here are some tips to help you:
- Use strong, unique passwords for each of your accounts.
- Avoid sharing your PVA account login credentials with anyone to prevent unauthorized access.
- Enable two-factor authentication whenever possible.
- Avoid clicking on suspicious links or downloading files from untrusted sources.
- Verify the authenticity of any third-party apps or services before granting them access to your PVA accounts.
- Regularly update your account settings and privacy preferences.
By implementing these security measures, you can minimize the risk of unauthorized access or compromise to your PVA accounts, ensuring they remain secure and authentic.
How Do PVA Accounts Safeguard Your Online Presence?
PVA accounts play a vital role in safeguarding your online presence by adding an extra layer of security. By verifying your phone number during the account creation process, you can ensure that only you can access your account. This verification step helps prevent unauthorized access, protect sensitive information, and maintain the integrity of your online profiles. Knowing that your online presence is safeguarded against potential threats or fraudulent activities gives you peace of mind.
How Do PVA Accounts Balance User Convenience and Confidentiality?
PVA accounts strike a balance between user convenience and confidentiality, enhancing the user experience while maintaining data security:
- Allow users to access and manage multiple profiles or brands within a single login interface, simplifying account management.
- Enable users to interact with online platforms without triggering suspicion or limitations, enhancing convenience.
- Ensure the confidentiality and privacy of user data through secure verification processes and robust account security measures.
How Do PVA Accounts Streamline Transactions and Customer Relations?
PVA accounts streamline transactions and customer relations by providing a secure, efficient, and trustworthy platform for engaging with your audience:
- Facilitate smooth and secure online transactions, reducing friction and enhancing user confidence in your business or brand.
- Enable personalized customer relations through targeted engagement and tailored interactions.
- Build trust and credibility with your customers, leading to long-term relationships and increased customer loyalty.
By optimizing your PVA accounts and adhering to these best practices, you can leverage the full potential of these accounts for maximum efficiency, better online presence, and improved customer relations.
Why Do You Need PVA Accounts for Your Online Activities?
PVA accounts, or Phone Verified Accounts, are essential for online activities. These accounts require a valid phone number for verification, providing an added layer of security. PVA accounts enable you to access and utilize different online platforms and services effectively. PVA accounts are necessary whether you need them for social media marketing, email marketing, or classified ad posting. They allow you to create multiple accounts on various platforms, expanding your reach and enhancing your online presence. PVA accounts enable you to engage with a broader audience, promote your business, and accomplish your online goals. So, if you want to maximize your online activities, having PVA accounts is crucial.
What Strategies Can You Use for Multi-Account Management?
Regarding multi-account management, several strategies can help you streamline your processes and ensure efficiency. Let’s explore some of the best methods for bulk accounts management:
- Firstly, consider using a centralized platform or software to access and manage all your accounts in one place. This can save you time and effort by eliminating the need to log in and out of multiple accounts.
- Secondly, create a schedule or set reminders to check and update each account regularly. This will help you stay organized and ensure that everything runs smoothly.
- Additionally, consider delegating tasks or hiring a team to assist you with managing multiple accounts. This can alleviate some of the workload and ensure all accounts are appropriately attended to.
- Lastly, regularly analyze and assess the performance of each account. This will allow you to identify any areas for improvement and make necessary adjustments to optimize your account management strategies.
By implementing these strategies, you can effectively manage multiple accounts and achieve your desired results.
What is the Effectiveness and Success Rate of PVA Accounts?
PVA accounts, or Phone Verified Accounts, have become widely popular online. These accounts are created using a valid phone number, adding an extra layer of security and authenticity. The effectiveness of PVA accounts lies in their ability to bypass certain restrictions and provide users with more features and options.
Moreover, the success rate of PVA accounts is relatively high, as they are less likely to get flagged or suspended than regular accounts. With their verified status, PVA accounts can be used for multiple purposes, such as social media marketing, online advertising, and buying and selling goods and services. Using PVA accounts can significantly enhance one’s online presence and business opportunities.
How Do You Select the Right PVA Account Provider?
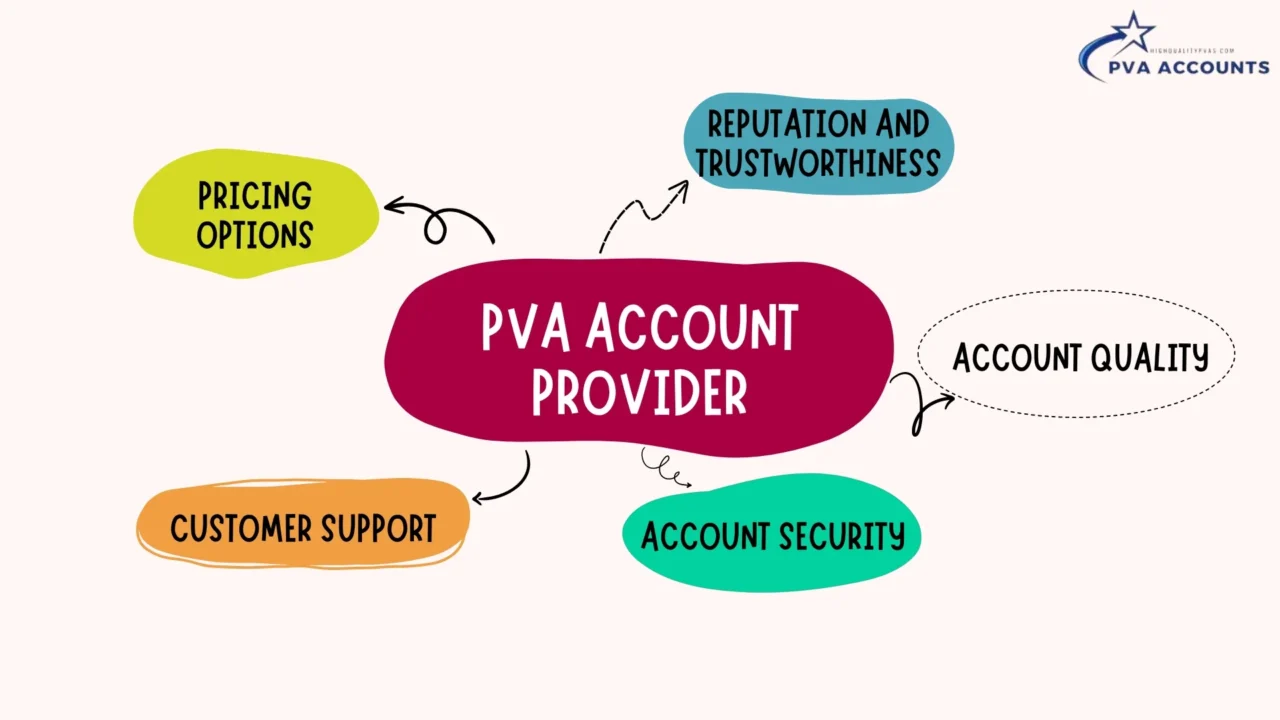
When choosing a reliable PVA account provider, several key factors must be considered. Making the right choice is crucial as it will determine the quality and authenticity of the PVA accounts you obtain. To ensure that you are getting the best value for your investment, here are the five factors you should carefully evaluate:
- Reputation and Trustworthiness: Look for a provider with a solid reputation in the industry. Check customer reviews and testimonials to gauge their trustworthiness and reliability.
- Account Quality: Ensure that the PVA accounts offered by the provider are of high quality. They should be appropriately verified and meet the standards required for authenticity and credibility.
- Account Security: The provider should prioritize the security of the PVA accounts they offer. This includes measures such as secure verification processes, protection against hacking or unauthorized access, and confidentiality of account information.
- Customer Support: A reliable provider should offer excellent customer support to assist you with any queries, concerns, or technical issues related to the PVA accounts. Look for providers that are responsive, accessible, and knowledgeable.
- Pricing Options: Consider the pricing options offered by different providers. Compare the cost of the PVA accounts with the quality and level of service provided to ensure that you are getting fair and competitive pricing.
By carefully evaluating these factors, you can select the right PVA account provider that meets your needs and requirements. Remember that choosing a reputable and reliable provider is essential for obtaining high-quality and authentic PVA accounts to enhance your online presence and digital marketing efforts.
To help you make an informed decision, here is an image that visually represents the process of selecting the trusted PVA account provider:
Conclusion: Unlocking the Potential of PVA Accounts in the Digital Realm
In conclusion, PVA accounts have become integral to the digital landscape. Their importance must address authenticity, and trust-building on online platforms cannot be overstated.
Whether you want to establish your brand or a business aiming to expand your online presence, having a verified account can make all the difference. It provides peace of mind and opens up opportunities for enhanced features and functionalities that can help you stand out from the crowd.
So next time you come across the term “PVA account,” you’ll know exactly what it means – a powerful tool that unlocks your potential in the digital realm!